
Last updated: 2026-09-03
This guide gets you from signup to your first useful chat in CoopAI.
What you'll need
- VS Code 1.85 or later
- A CoopAI account (free signup or invited by your org admin)
- A local workspace folder open in VS Code
Step 1 — Create an account
Browser → coop-ai.dev/signup/free
Enter your work email and create a password, or continue with Google. Coop sends a verification link on password signup; you can sign in before verifying (soft verify).
For Pro or Enterprise, start at Pricing and follow checkout to the Welcome page. Sign in with the same email you used at checkout.
Forgot your password? → coop-ai.dev/forgot-password
Step 2 — Install the extension
See Install the VS Code extension for marketplace and manual install options.
Step 3 — Sign in
- Extension UI — Open Coop sidebar → gear icon (or CoopAI: Open Settings).
- Account — Choose a sign-in path:
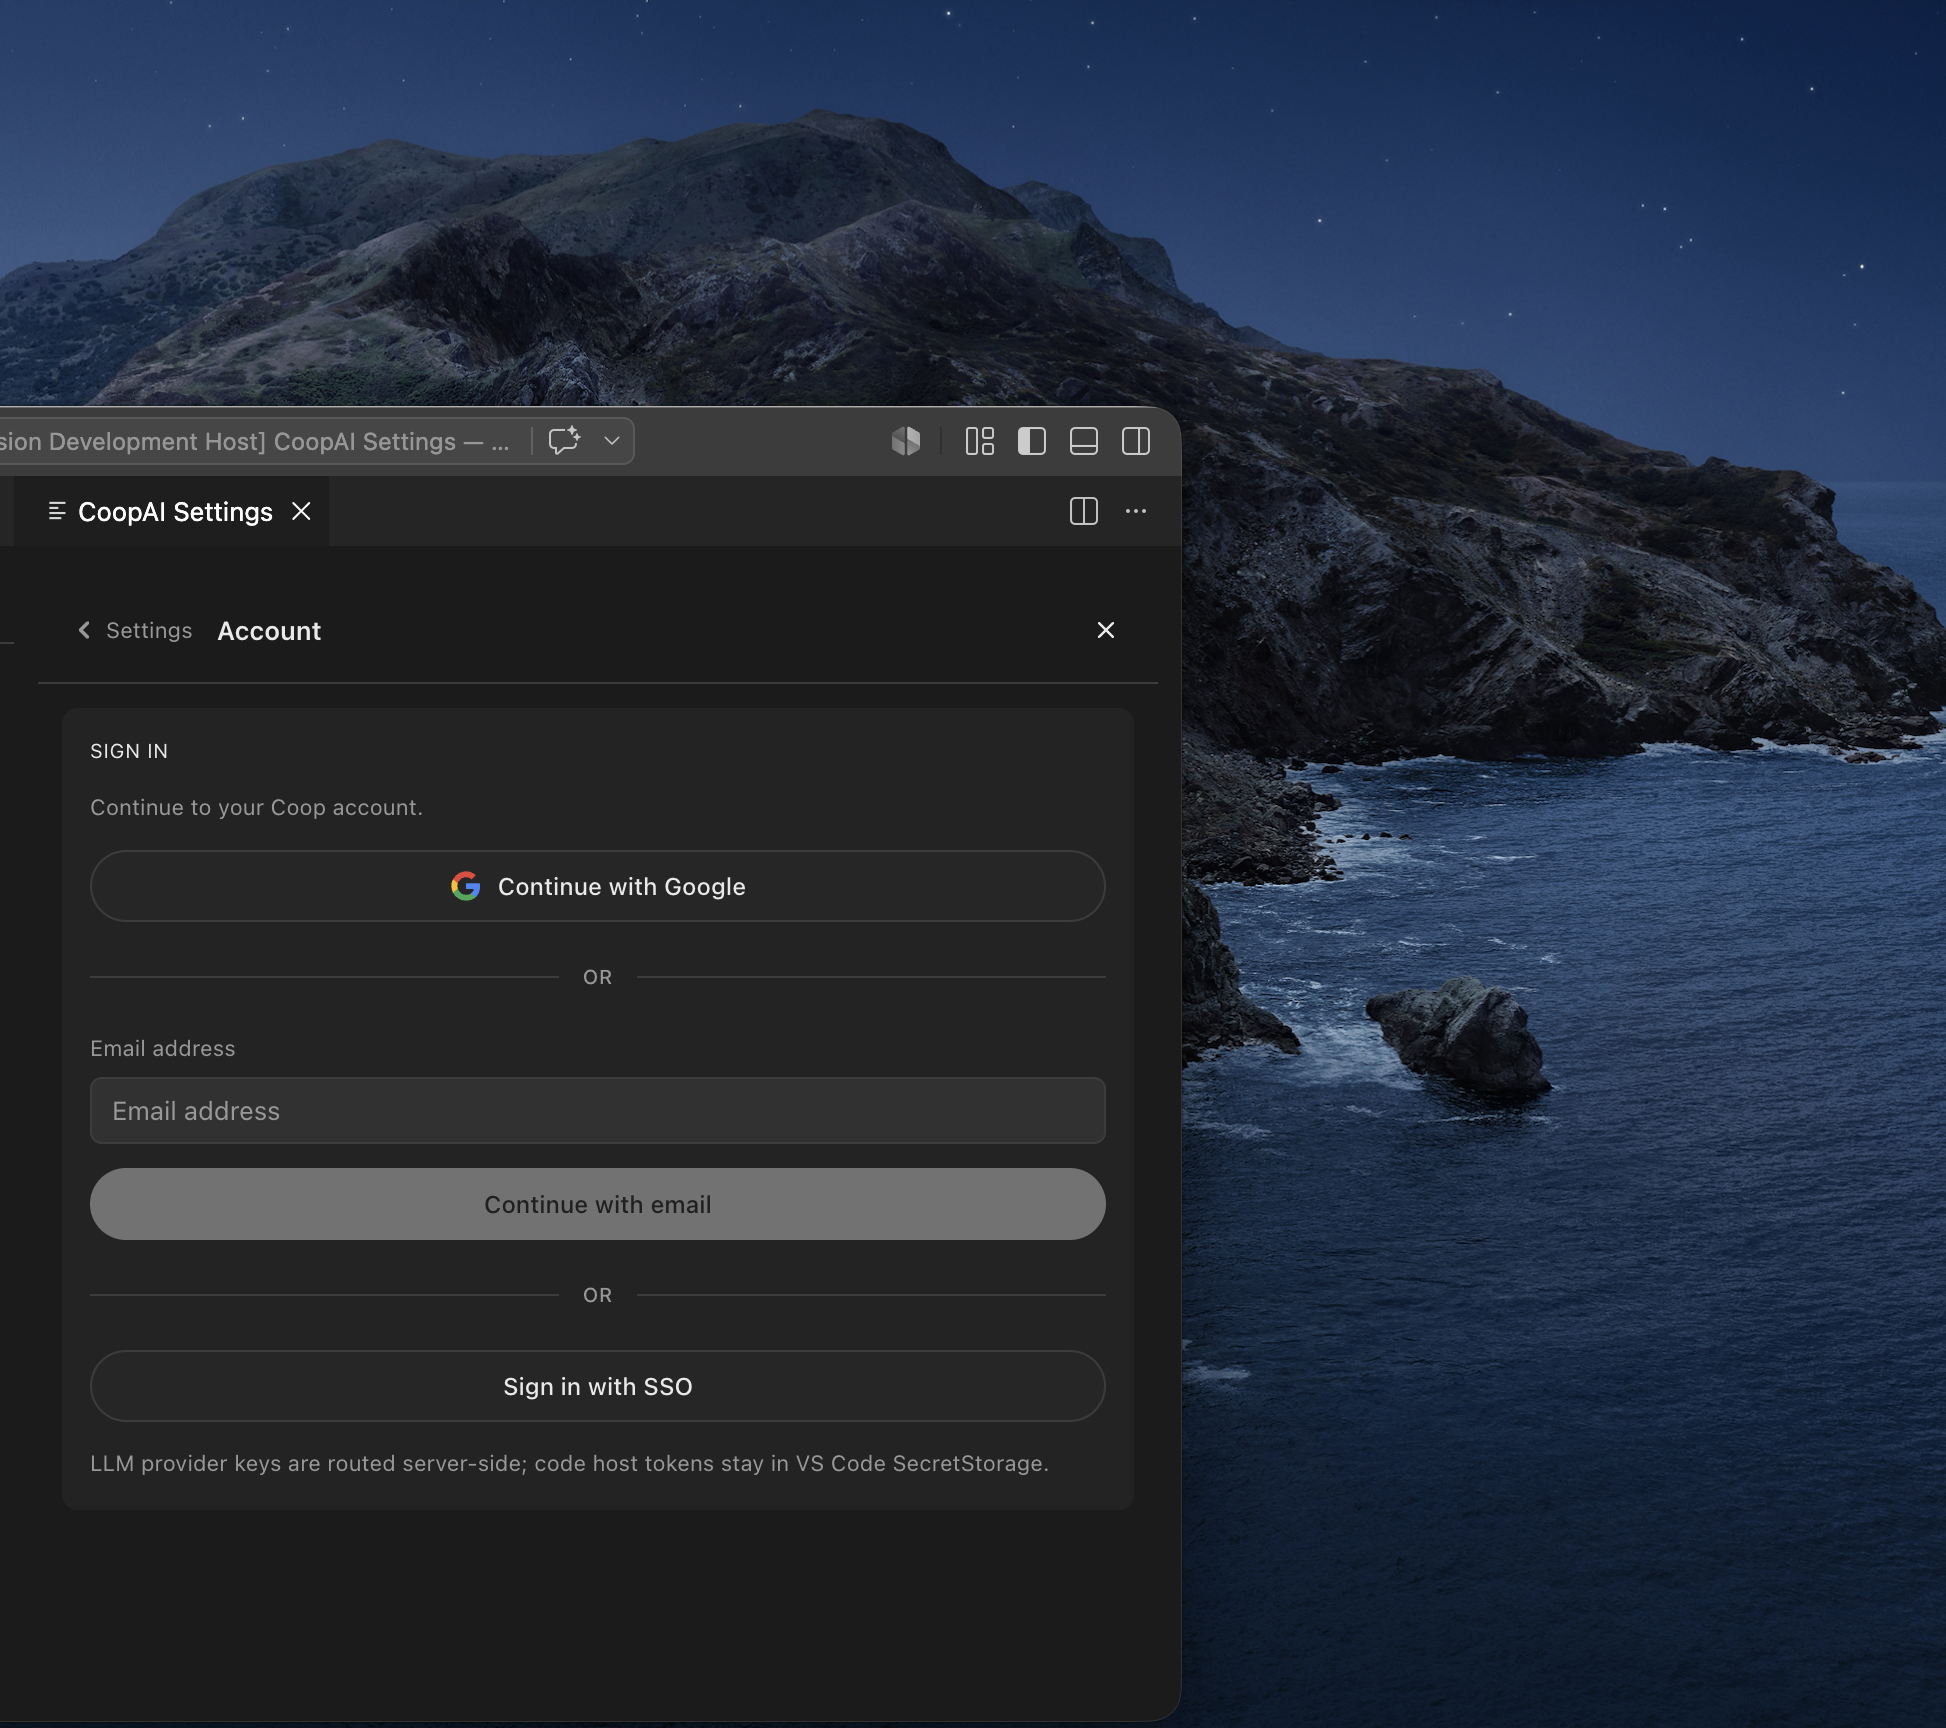
| Path | Steps |
|---|---|
| Continue with Google | Click the Google button at the top |
| Continue with email | Enter email → Continue with email → password → Sign in |
| Sign in with SSO | Enterprise: enter Organization name → Sign in with SSO → finish in your browser |
- Success: Account shows your org and plan. Open chat and ask a question.
Enterprise SSO: Organization name is required before Sign in with SSO. Coop opens your system browser for IdP login; VS Code completes the session when you return. Name matching is case-insensitive.
Automation API keys are for CI/scripts only — create them in the admin portal if needed, not in the extension.
Step 4 — Ask your first question
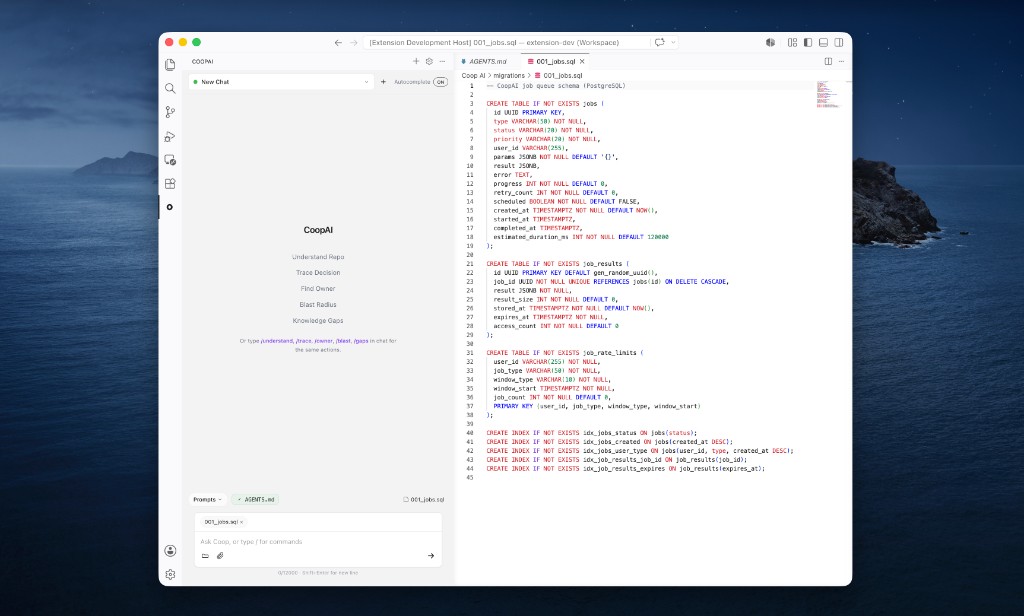
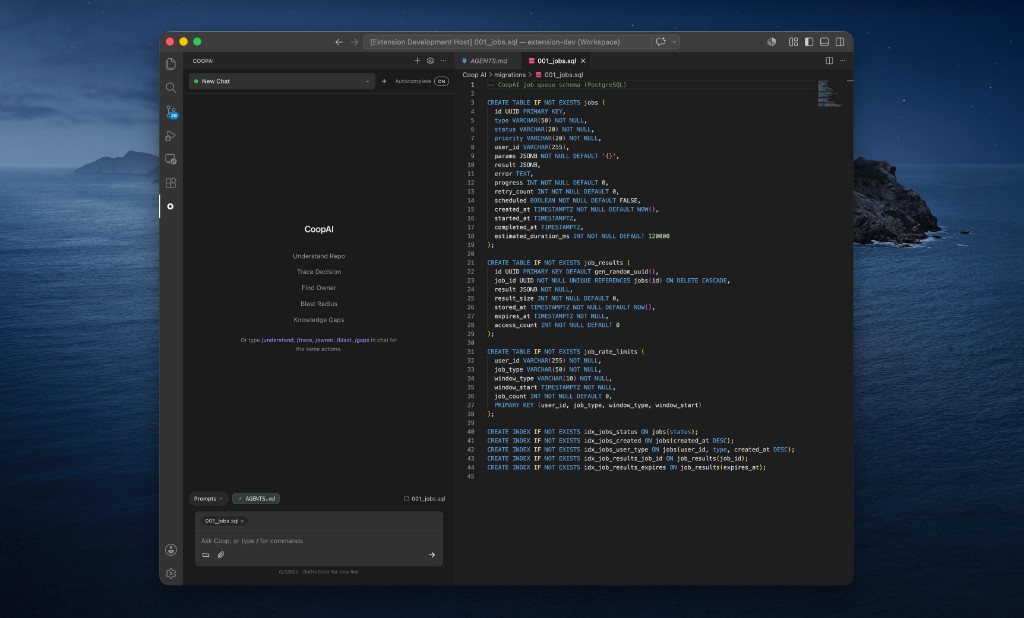
Open the Coop icon in the activity bar. Type in the composer, open Workflows in the chat header, or type / for commands.
- Open a file in your workspace. Coop shows it as the L (local) or R (remote) context chip above the composer — see Active file context chip.
- Extension UI — Type a question in the chat composer (plain chat works with a file chip).
- Try:
Explain this file. What are the main entry points nearby?
Coop streams an answer grounded in your workspace files and any connected integrations. On Auto, plain chat uses GPT-5 mini — see Model assignments.
Step 5 — Try a quick action
File-scoped actions (with a file open): highlight a few lines, then right-click the selection. Choose CoopAI: Trace Decision for Selection (or Find Owner, Blast Radius, Knowledge Gaps) to run immediately. You can also open Workflows in the chat header (inserts /trace so you can add a prompt) or type /trace yourself.
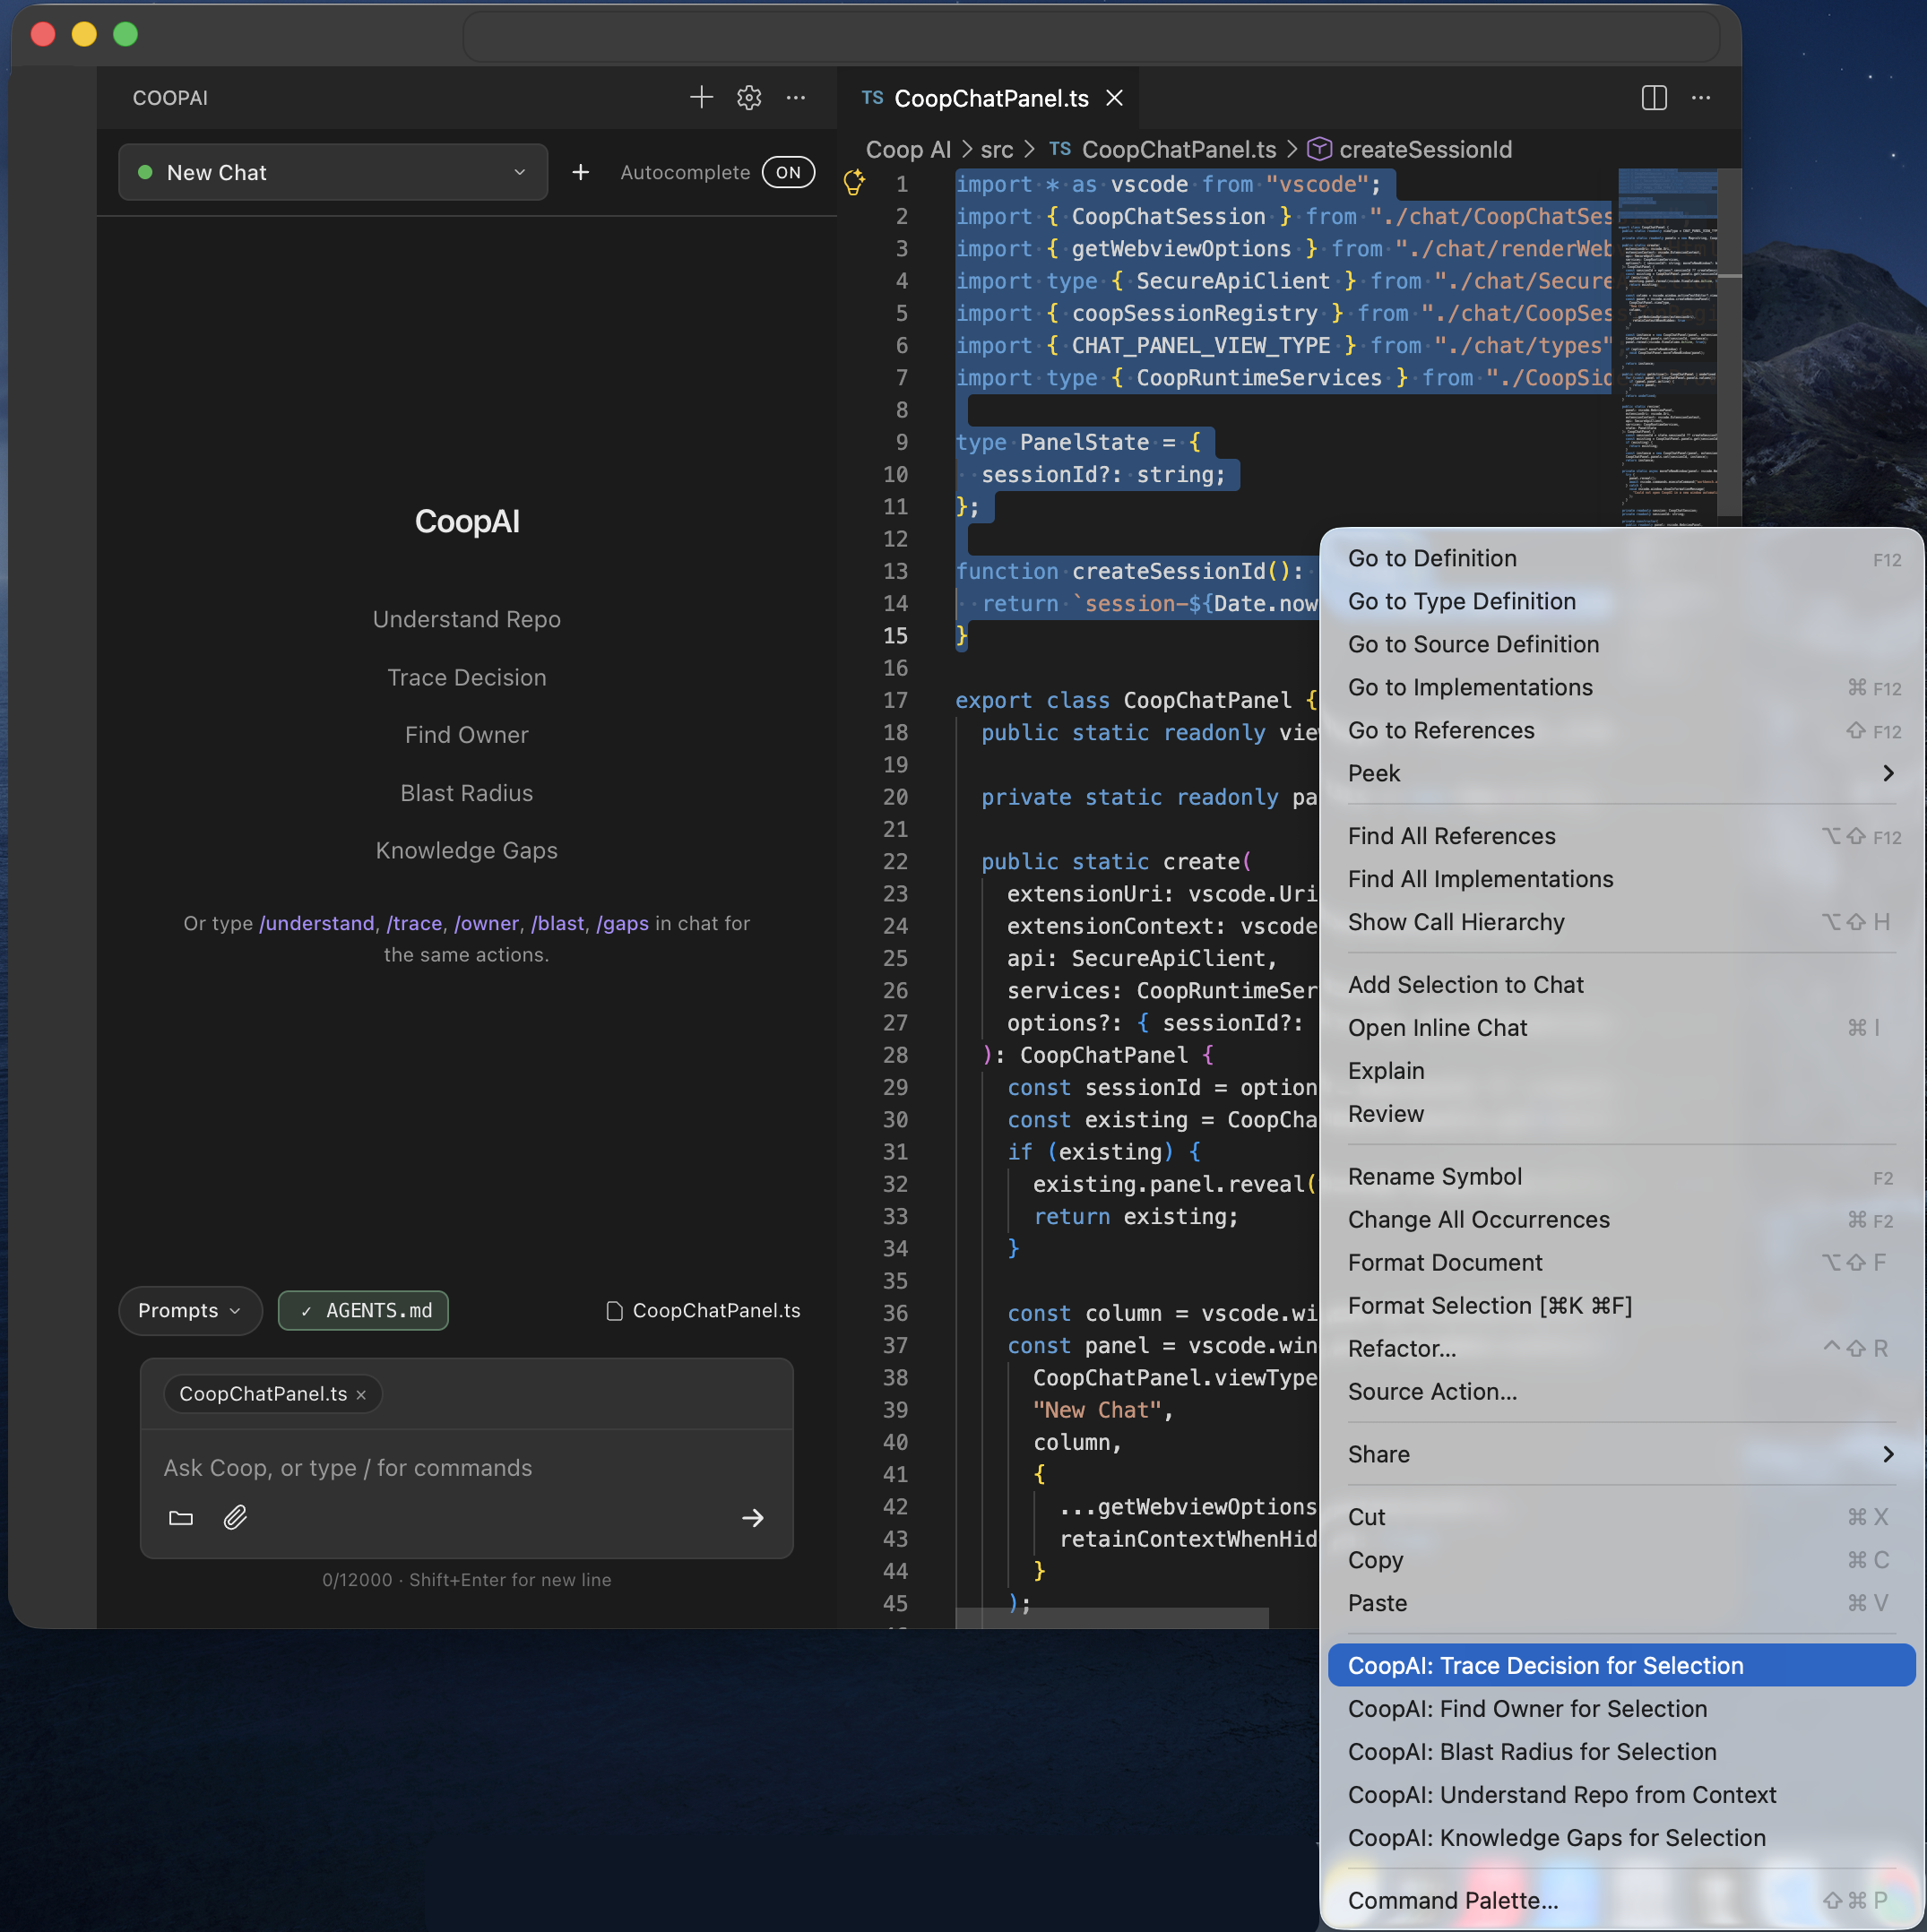
Understand Repo is different — it is repo-wide only and ignores a file chip:
- Extension UI — Open the remote file / repos picker.
- Select the repository (not a file) and click Use repo.
- Open Workflows → Understand Repo (inserts
/understand) or type/understand(aliases:/repo,/architecture,/explain). Add what you’re working on if you want, then send. Success: repo-only chip and the action enabled.
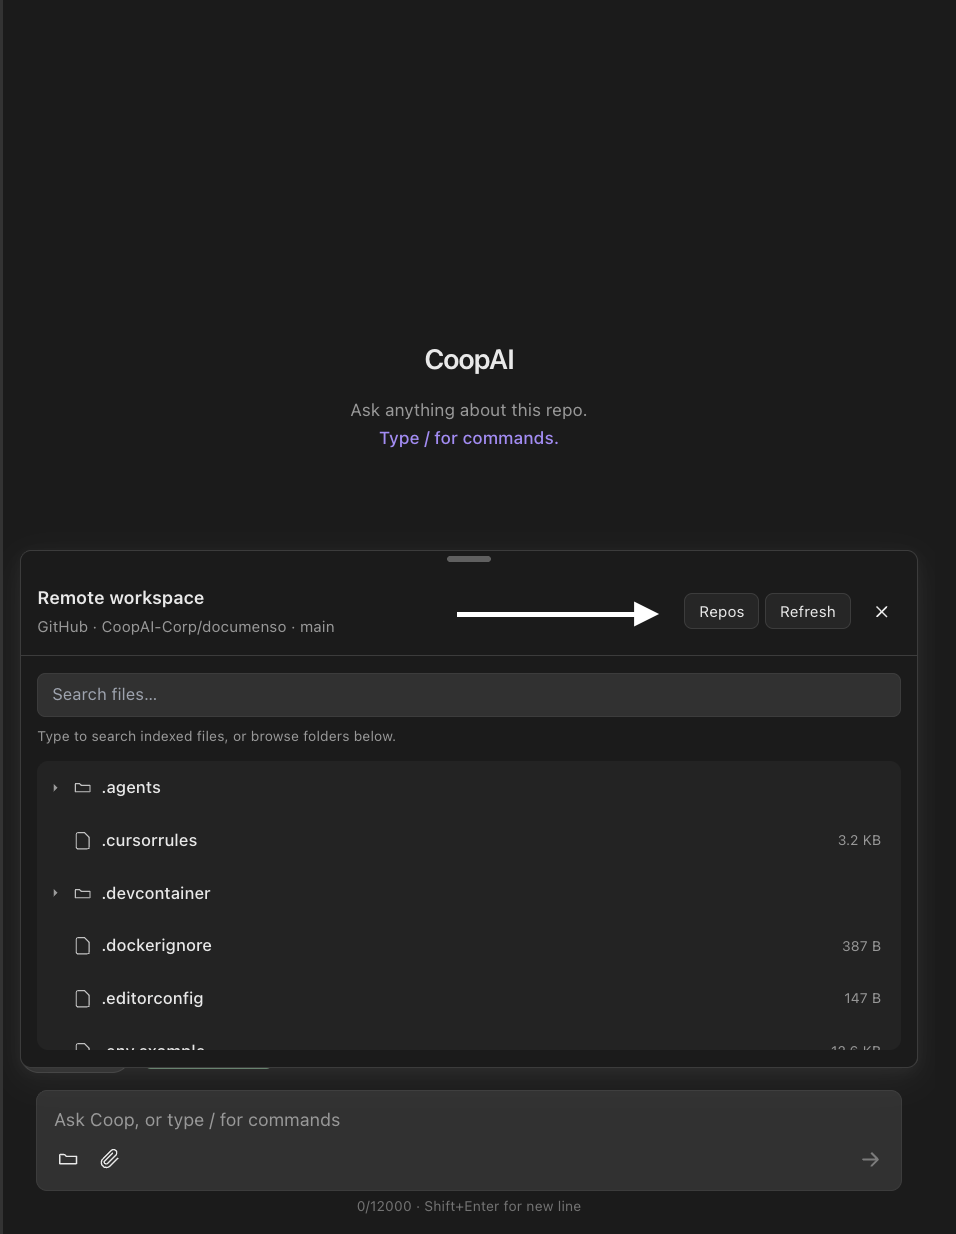
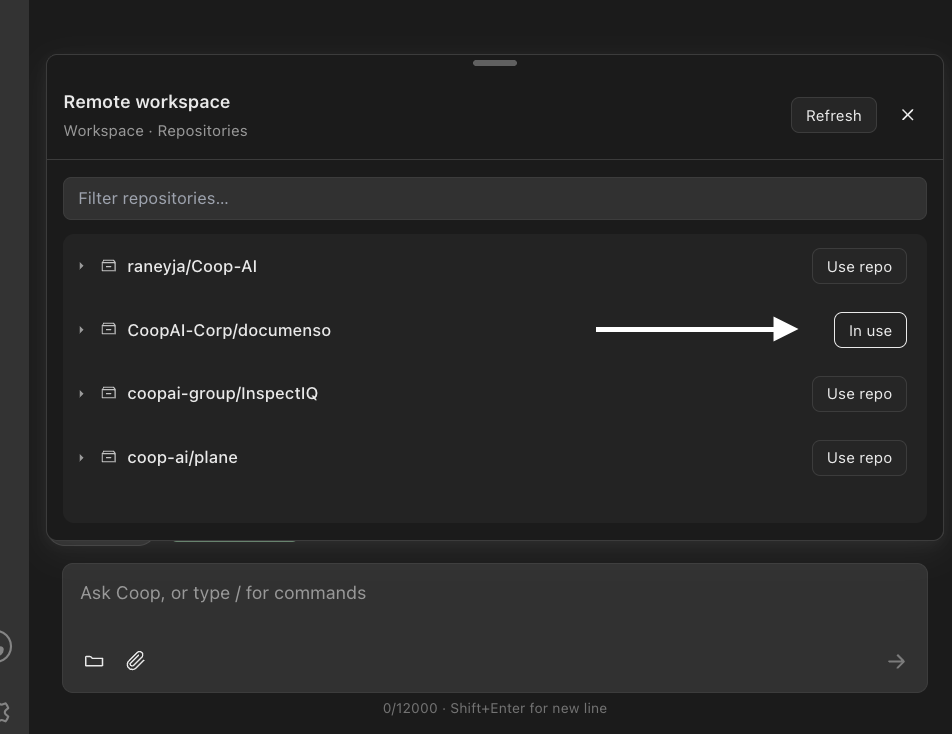
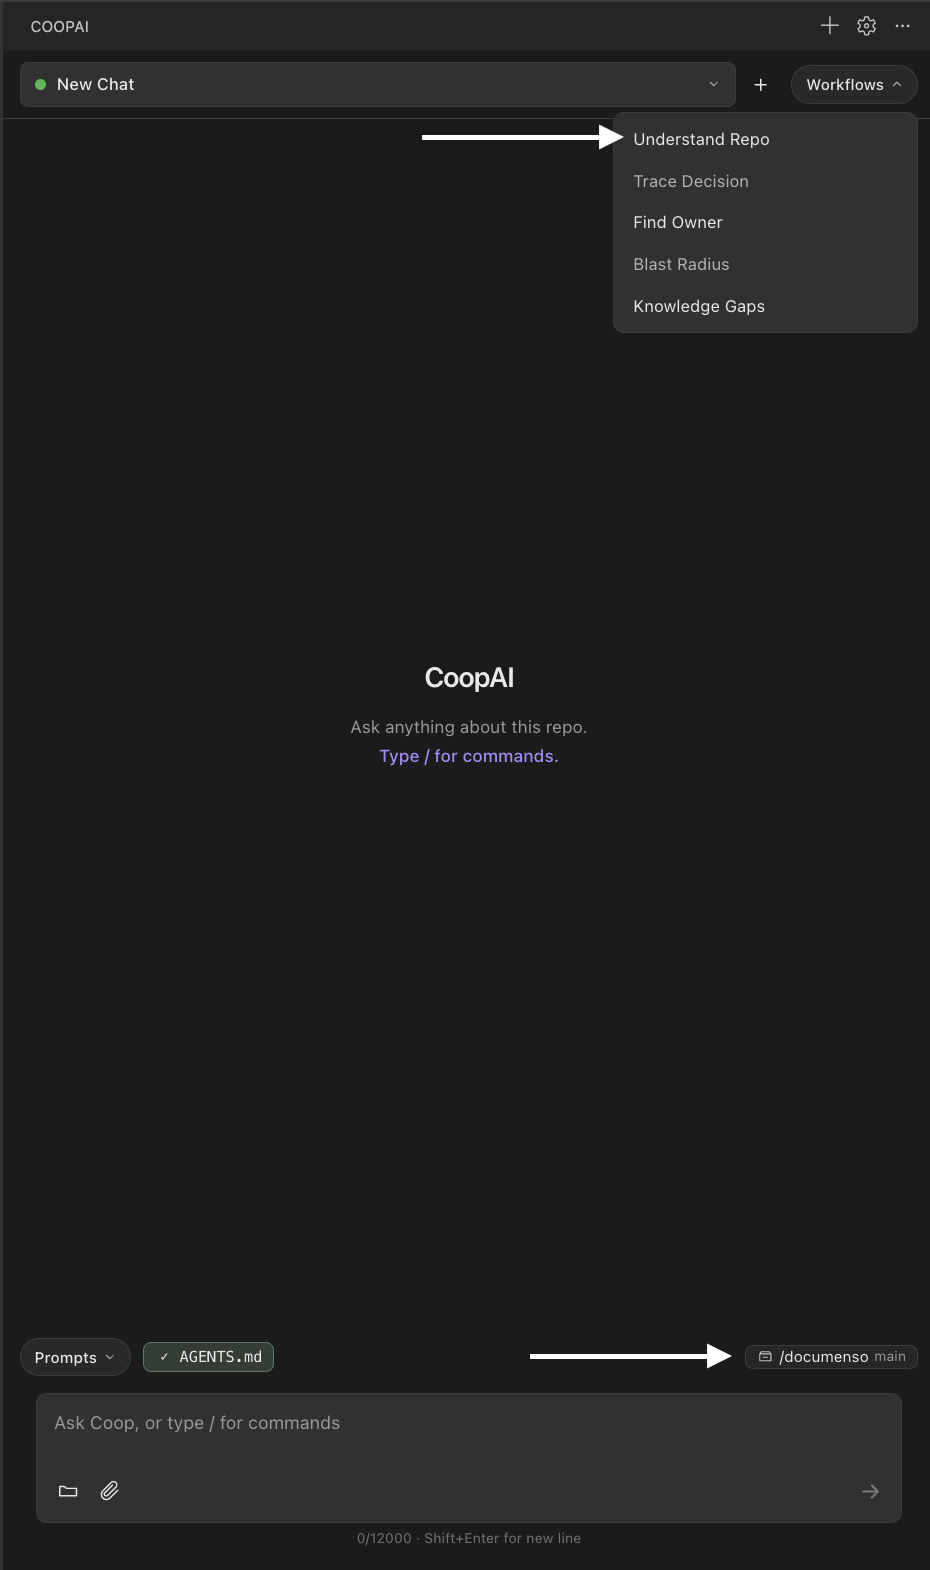
On Auto, quick actions use Claude Sonnet 4.6 for structured, repo-grounded answers. Full detail: Owner's Manual — Understand Repo.
Inline autocomplete
CoopAI shows ghost-text code completions by default as you type.
The sidebar header shows Autocomplete On for most installs. To turn it off: click Autocomplete in the header, or open CoopAI Settings → Preferences → Model & chat and uncheck Enable inline autocomplete → Save model settings.
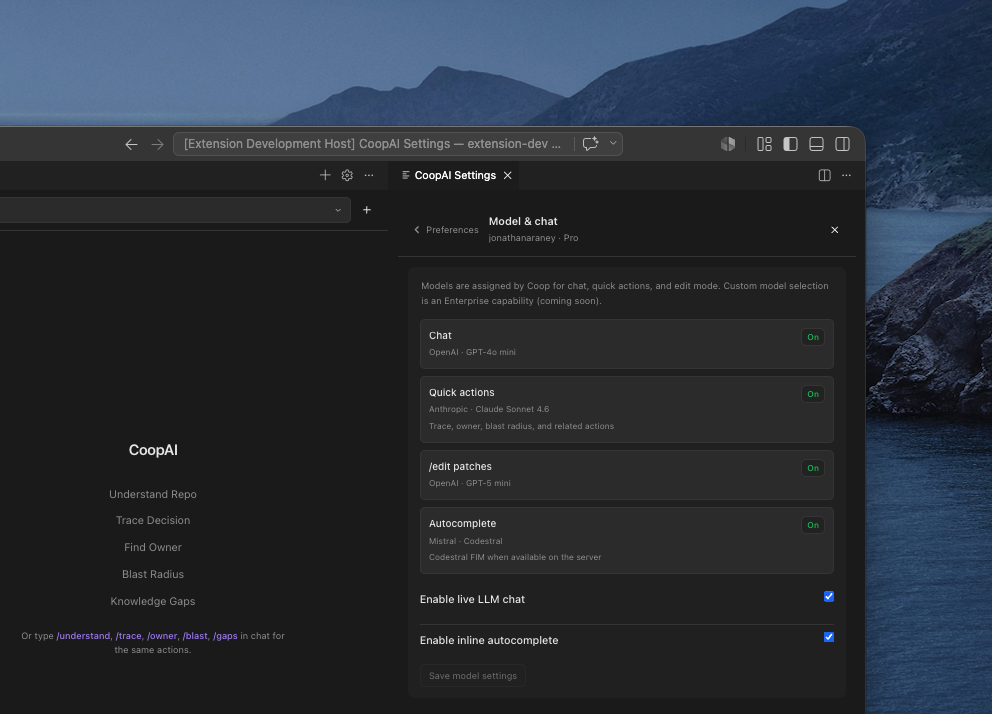
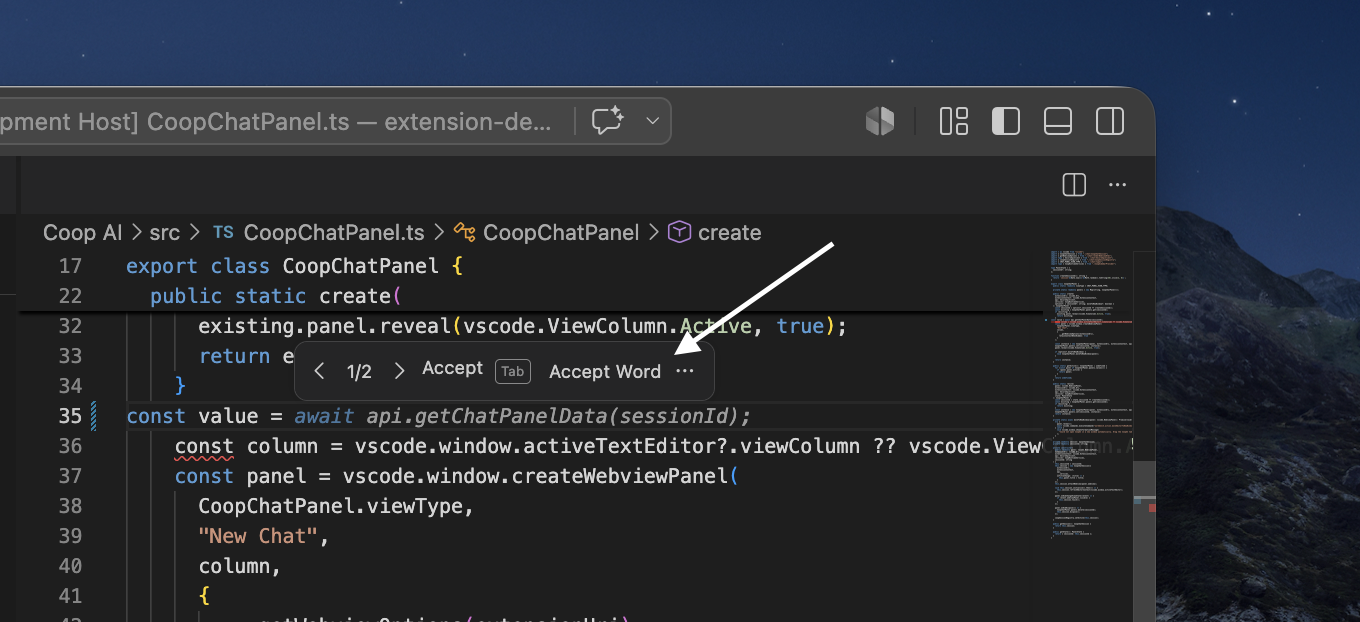
Type in a code file — ghost text appears after a short pause; Tab to accept.
See Inline autocomplete for FIM, graph context (indexed repos), Copilot coexistence, and how to turn off intentionally.
Verify production (smoke check)
After sign-in, confirm the hot path:
| Check | Success looks like |
|---|---|
| API health | Browser → api.coop-ai.dev/health returns OK |
| Model & chat | Settings → Preferences → Model & chat — how Auto works, what Auto uses, models by maker |
| Autocomplete | Sidebar Autocomplete On → type in .ts → ghost text → Tab accepts |
| Edit mode | /edit add a comment above this function → Apply / Undo on the patch notification |
| Create pull request | After Apply or after typing in a Use-repo file, click Create pull request or type Create a PR in chat → confirm branch, title, and notes → a link to the PR |
| Quick action (file) | /trace on a selection → structured answer with sources |
| Understand Repo | Use repo on the repository → Workflows → Understand Repo (inserts /understand) or type /understand → add a prompt if you want → send → repo-wide overview |
| Plain chat | Composer question → grounded reply (GPT-5 mini on Auto) |
More fixes: Troubleshooting.
Plans at a glance
| Plan | Best for |
|---|---|
| Developer (free) | Individual use — full integrations, 3-repo Deep-Index cap, solo seat |
| Pro | You or a team — unlimited indexing, $25/seat/month, usage analytics |
| Enterprise | Self-hosted, BYOK, zero-retention, SAML SSO, compliance |
Enterprise org admins: configure SAML in the admin portal before rolling SSO to your team — see Single Sign On (SSO).
See Plans & billing for details.
Next
- Model assignments — per-feature models and settings UI
- Inline autocomplete — ghost-text completions
- Edit mode —
/editpatches with apply and undo - Create pull request — open a PR from the patch card or by asking in chat
- Extension settings — workspace, tools, preferences
- Owner's Manual — daily use, quick actions, prompt library